

The Azure Virtual Machine Selector tool
Finding the right VM for the right workload in the right region has never been easier

When migrating applications from on-premises to Azure or when you are deploying a greed field project the biggest challenge always has been to choose the right Virtual Machine Configuration. There has to be a fine balance between performance and cost. The cost benefit analysis consumes a major chunk of a architects job. You cant just spin a random VM with gobs of RAM and attach a massive hard disk and expect things will run just fine.
With the plethora of VM sizes available the only option was to play around with the Azure Pricing Calculator and choose the right VM for the application workload to be deployed. Of course you also had to figure out whether the VM size is available in the region of choice and what would be the implications of running the VM from a pricing impact.
Microsoft has just released a tool to simplify the process for anyone who wants to simplify the process of VM selection.
The Azure Pricing Calculator option to select VM’s :

The VM Selector Tool simplifies this process a lot.
What are VM’s used for?
A lot of customers still deploy a majority of the applications using Infrastructure As a Service and that means provisioning some flavor of Windows or Linux VM’s and then installing applications on them for production or testing. Here are a few ways virtual machines are used:
Building and deploying apps to the cloud or migrating them.
Trying out a new operating system (OS) versions for testing and development.
Spinning up a new environments for rapid application deployments
Running older software or apps on newer operating systems to check for compatibility before production roll out
Running Graphic Intensive application on VM’s that may require a GPU
Implementing Remote Desktops for VDI or Work from Home scenarios.
There are 3 critical architecture elements that have been addressed in this tool and they are :
Finding Virtual Machines by the workload you plan to deploy.
Finding Virtual Machines by the OS and the Software you want to install
Finding Virtual Machines by the region chosen for Deployment.
The Virtual Machine Selector Tool:

The first option is the most comprehensive and provides the most number of wizards for you to chose from.
Choosing the right workload: Customers have a huge array of application landscape and its important to address these and the tool does provide multiple options that are self explanatory.
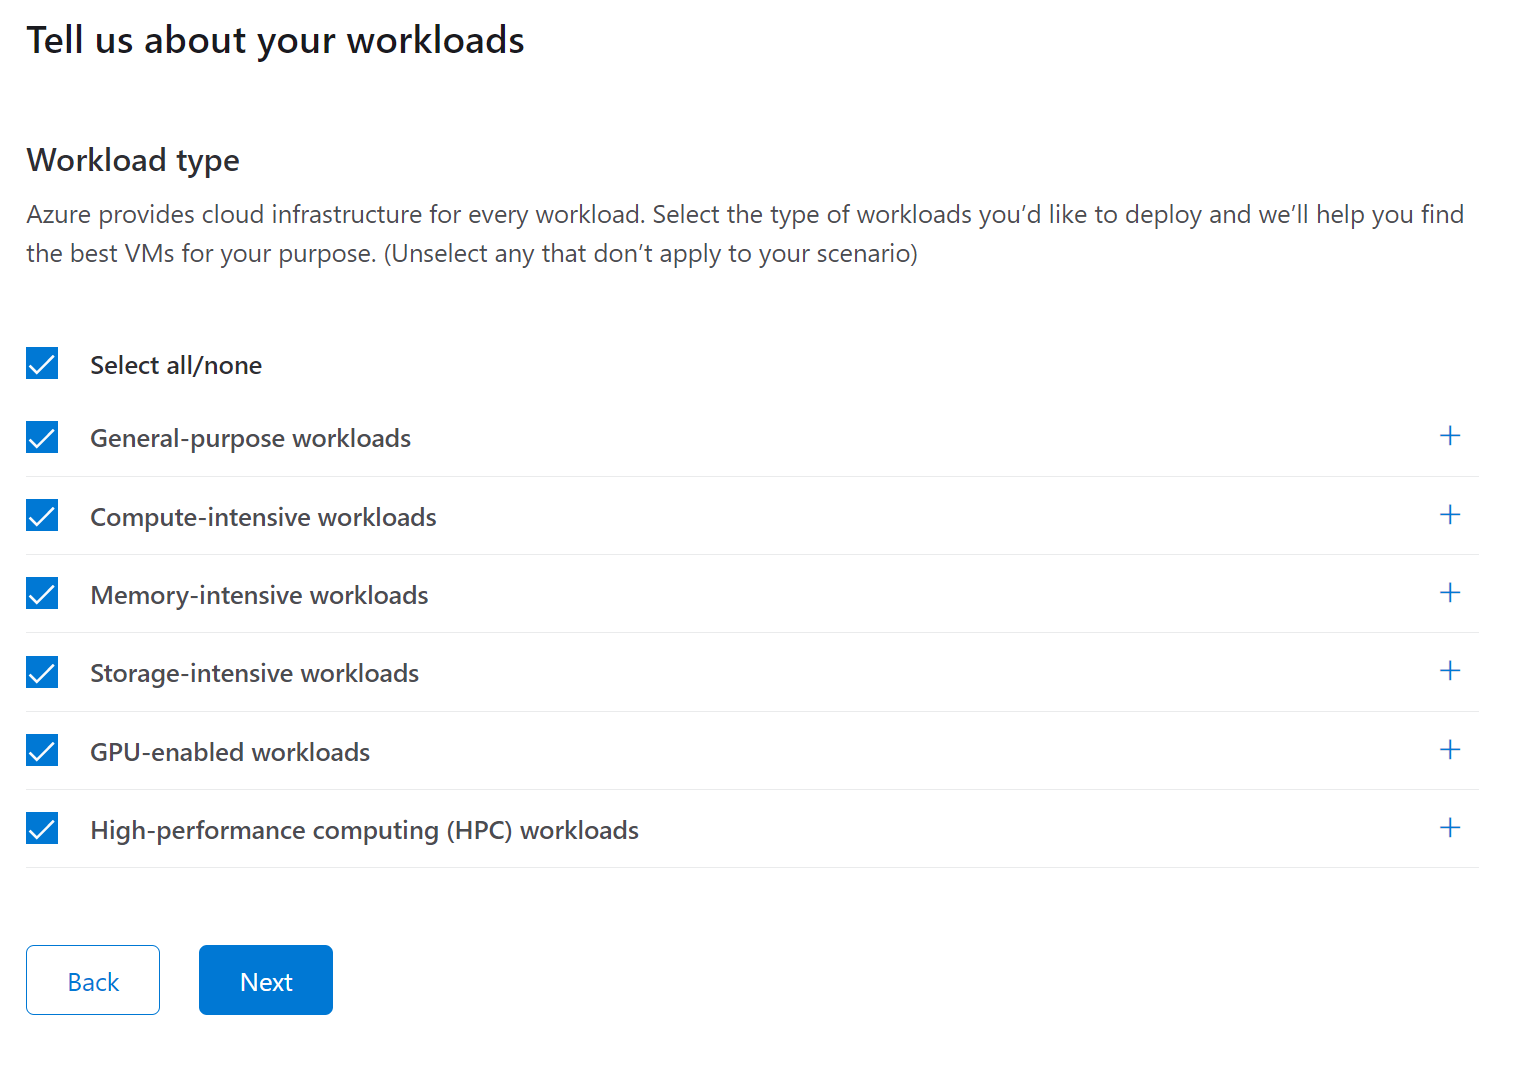
Choosing a workload type ( in this case I have chosen Compute Intensive, Storage Intensive and GPU enabled workloads) gives examples of these workloads and also provides the total number of VM’s that match the criteria on the right.


The next page gives you the option to enter the technical characteristics of the VM you are exploring. Enter the vCPU and RAM requirements for the applications you want to deploy.
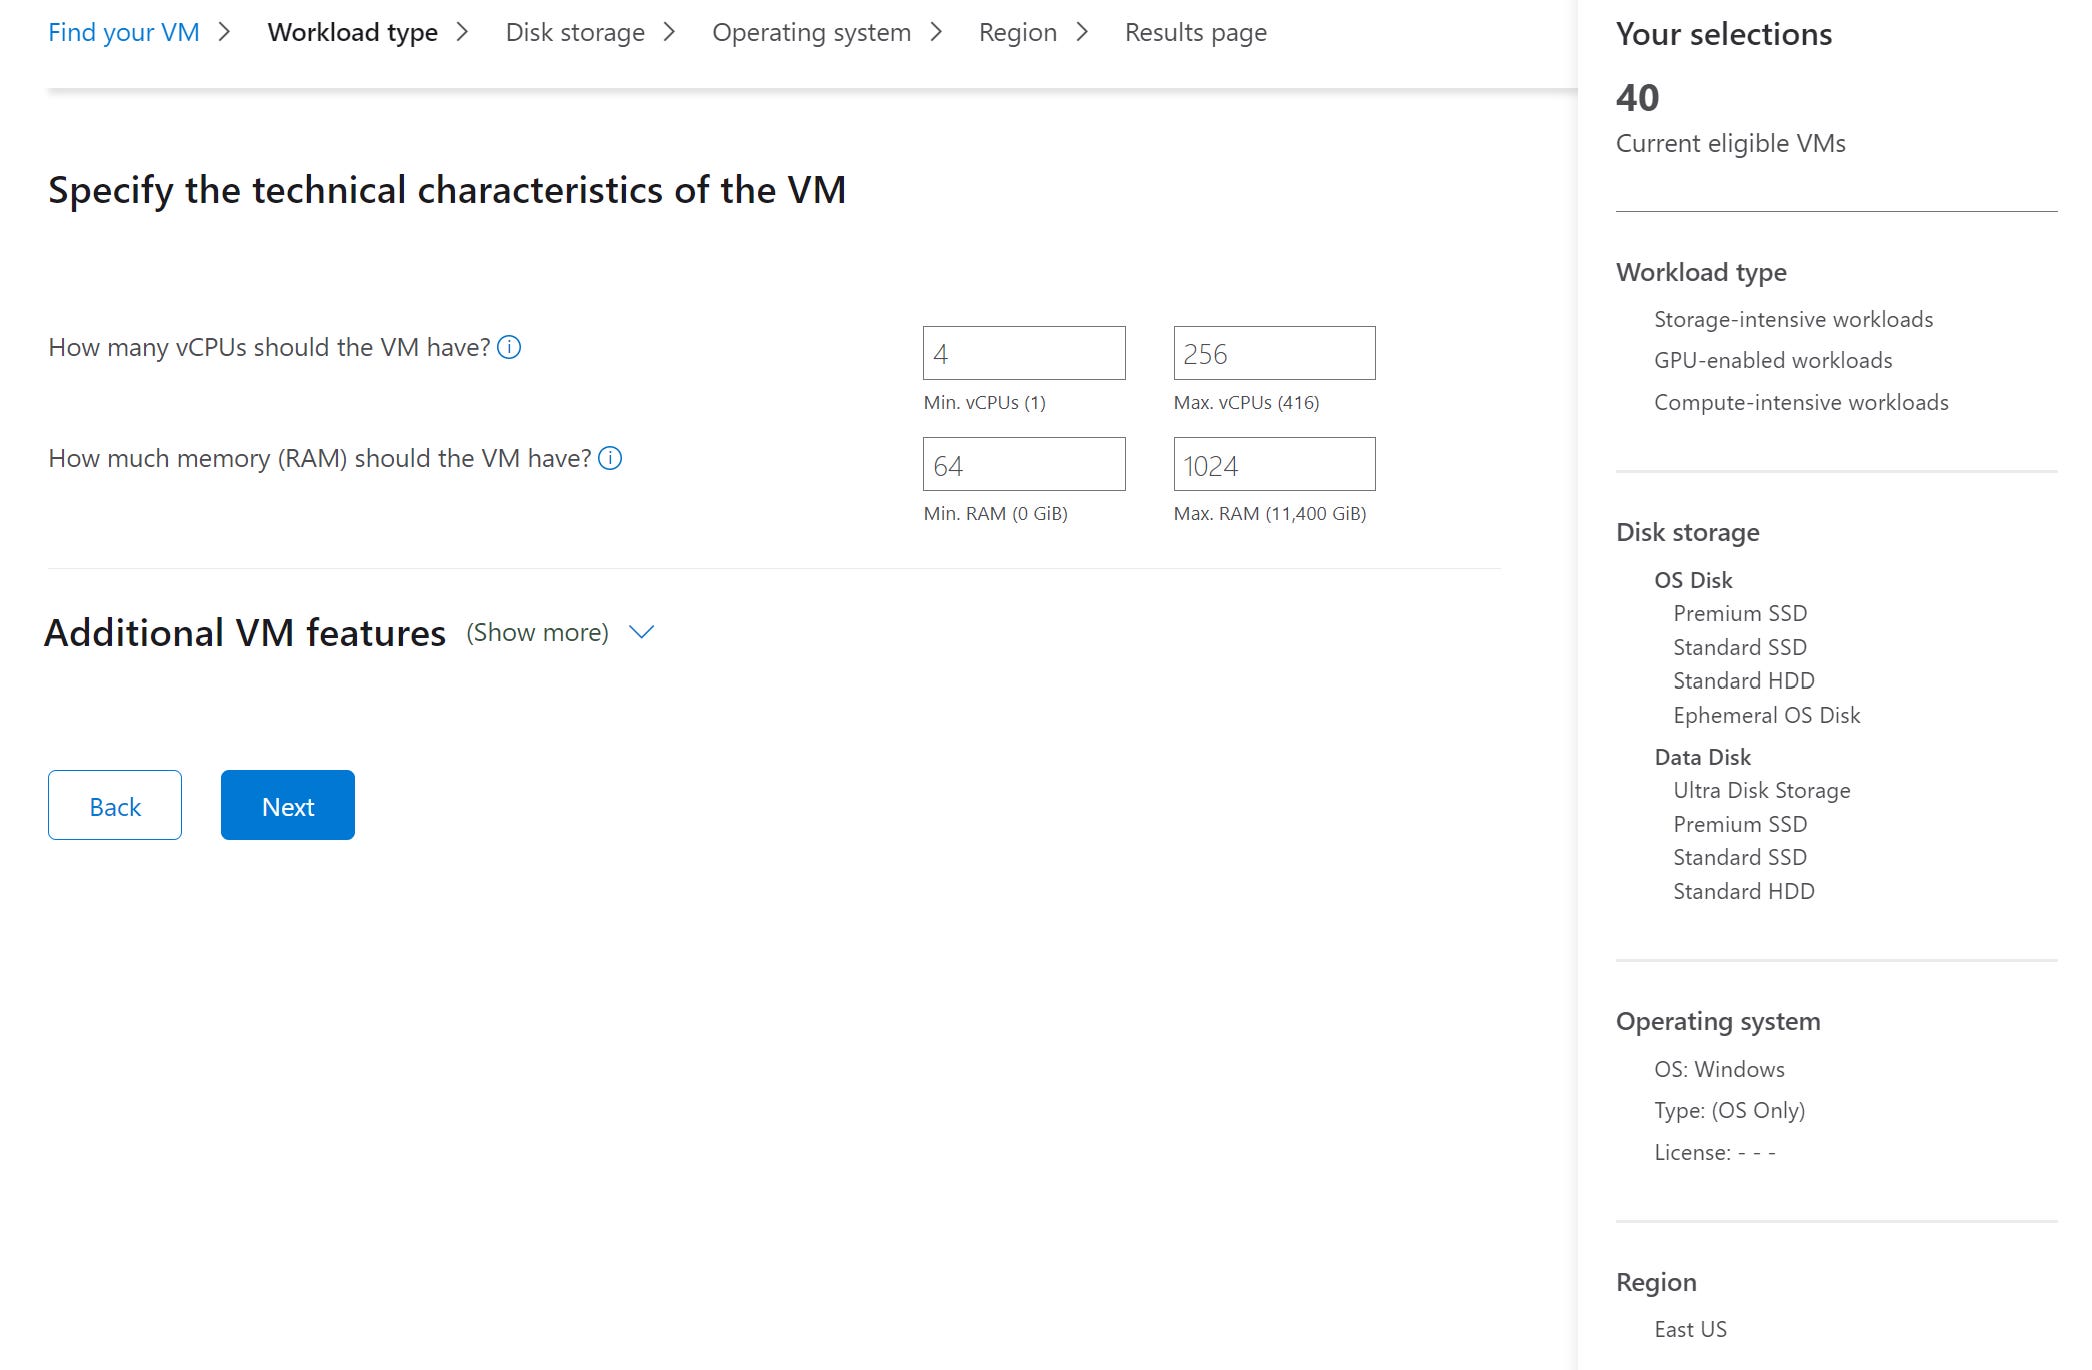
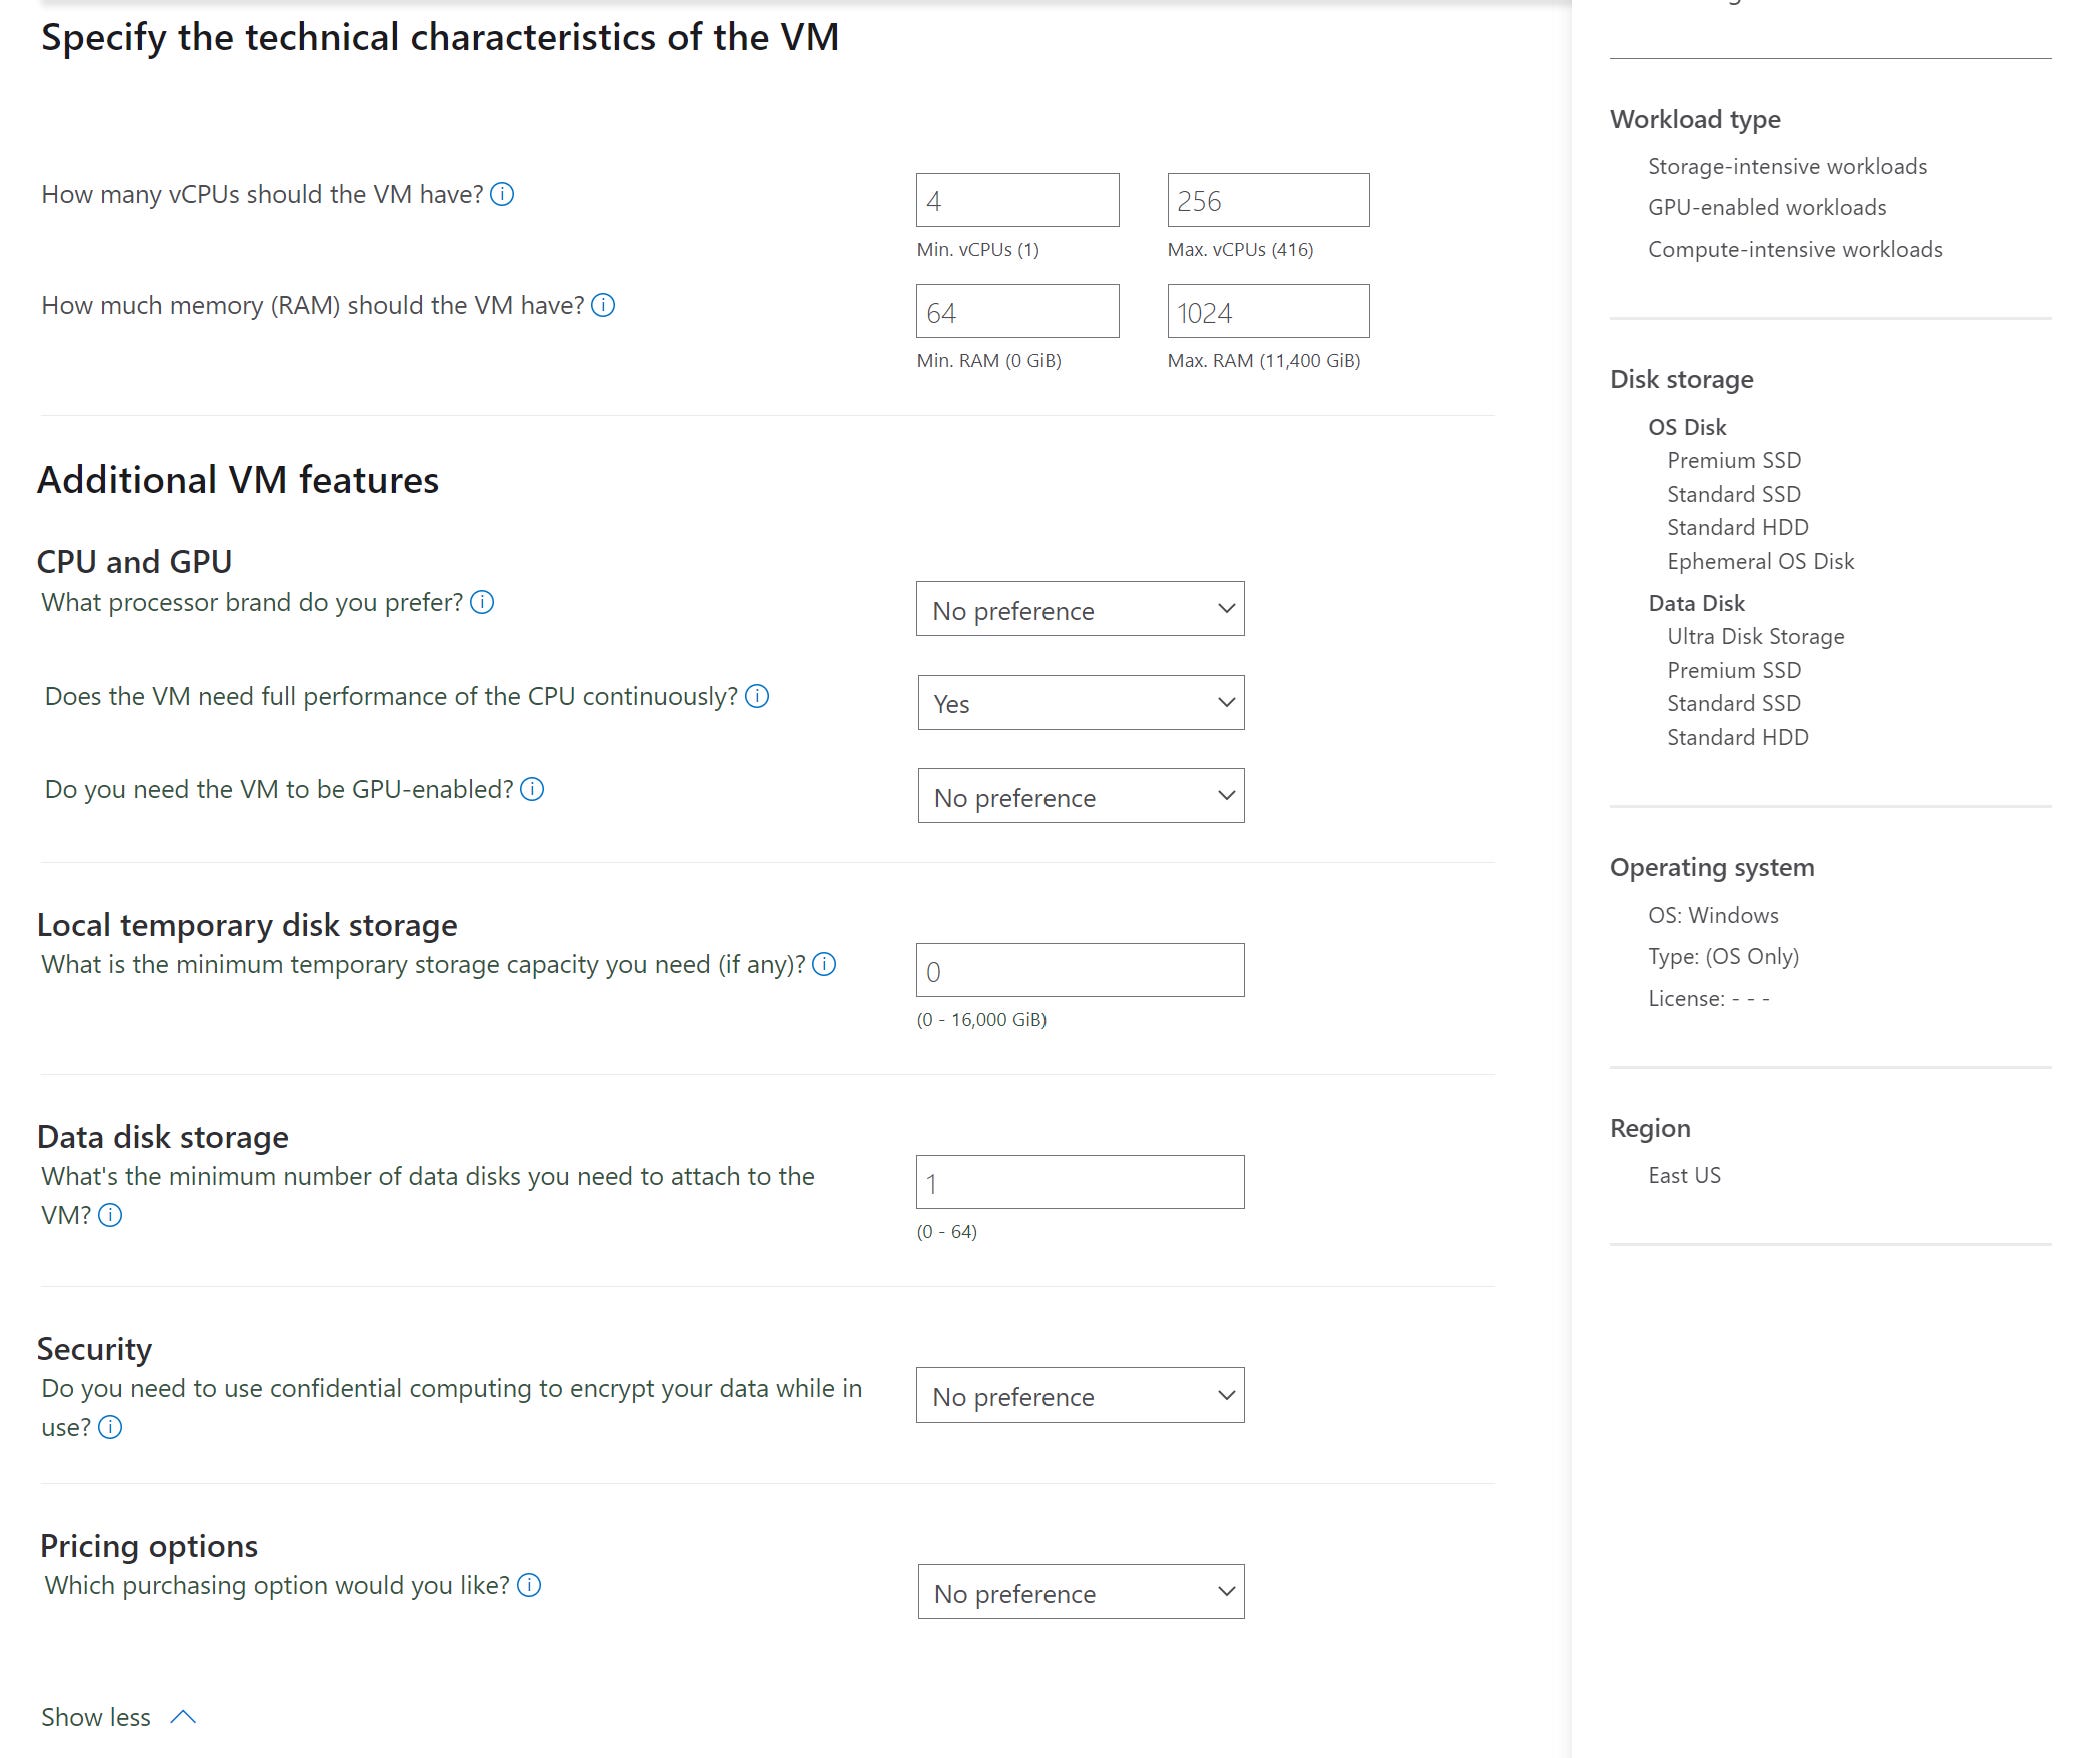
Selecting the Additional VM features drop down arrow gives you a much more granular mechanism to choose your VM’s. You can choose the vendor ) AMD/Intel) , temp disk storage required, Data disk storage, Confidential Computing requirement and Pricing options ( Pay as you go , Spot or Reserved Instances)
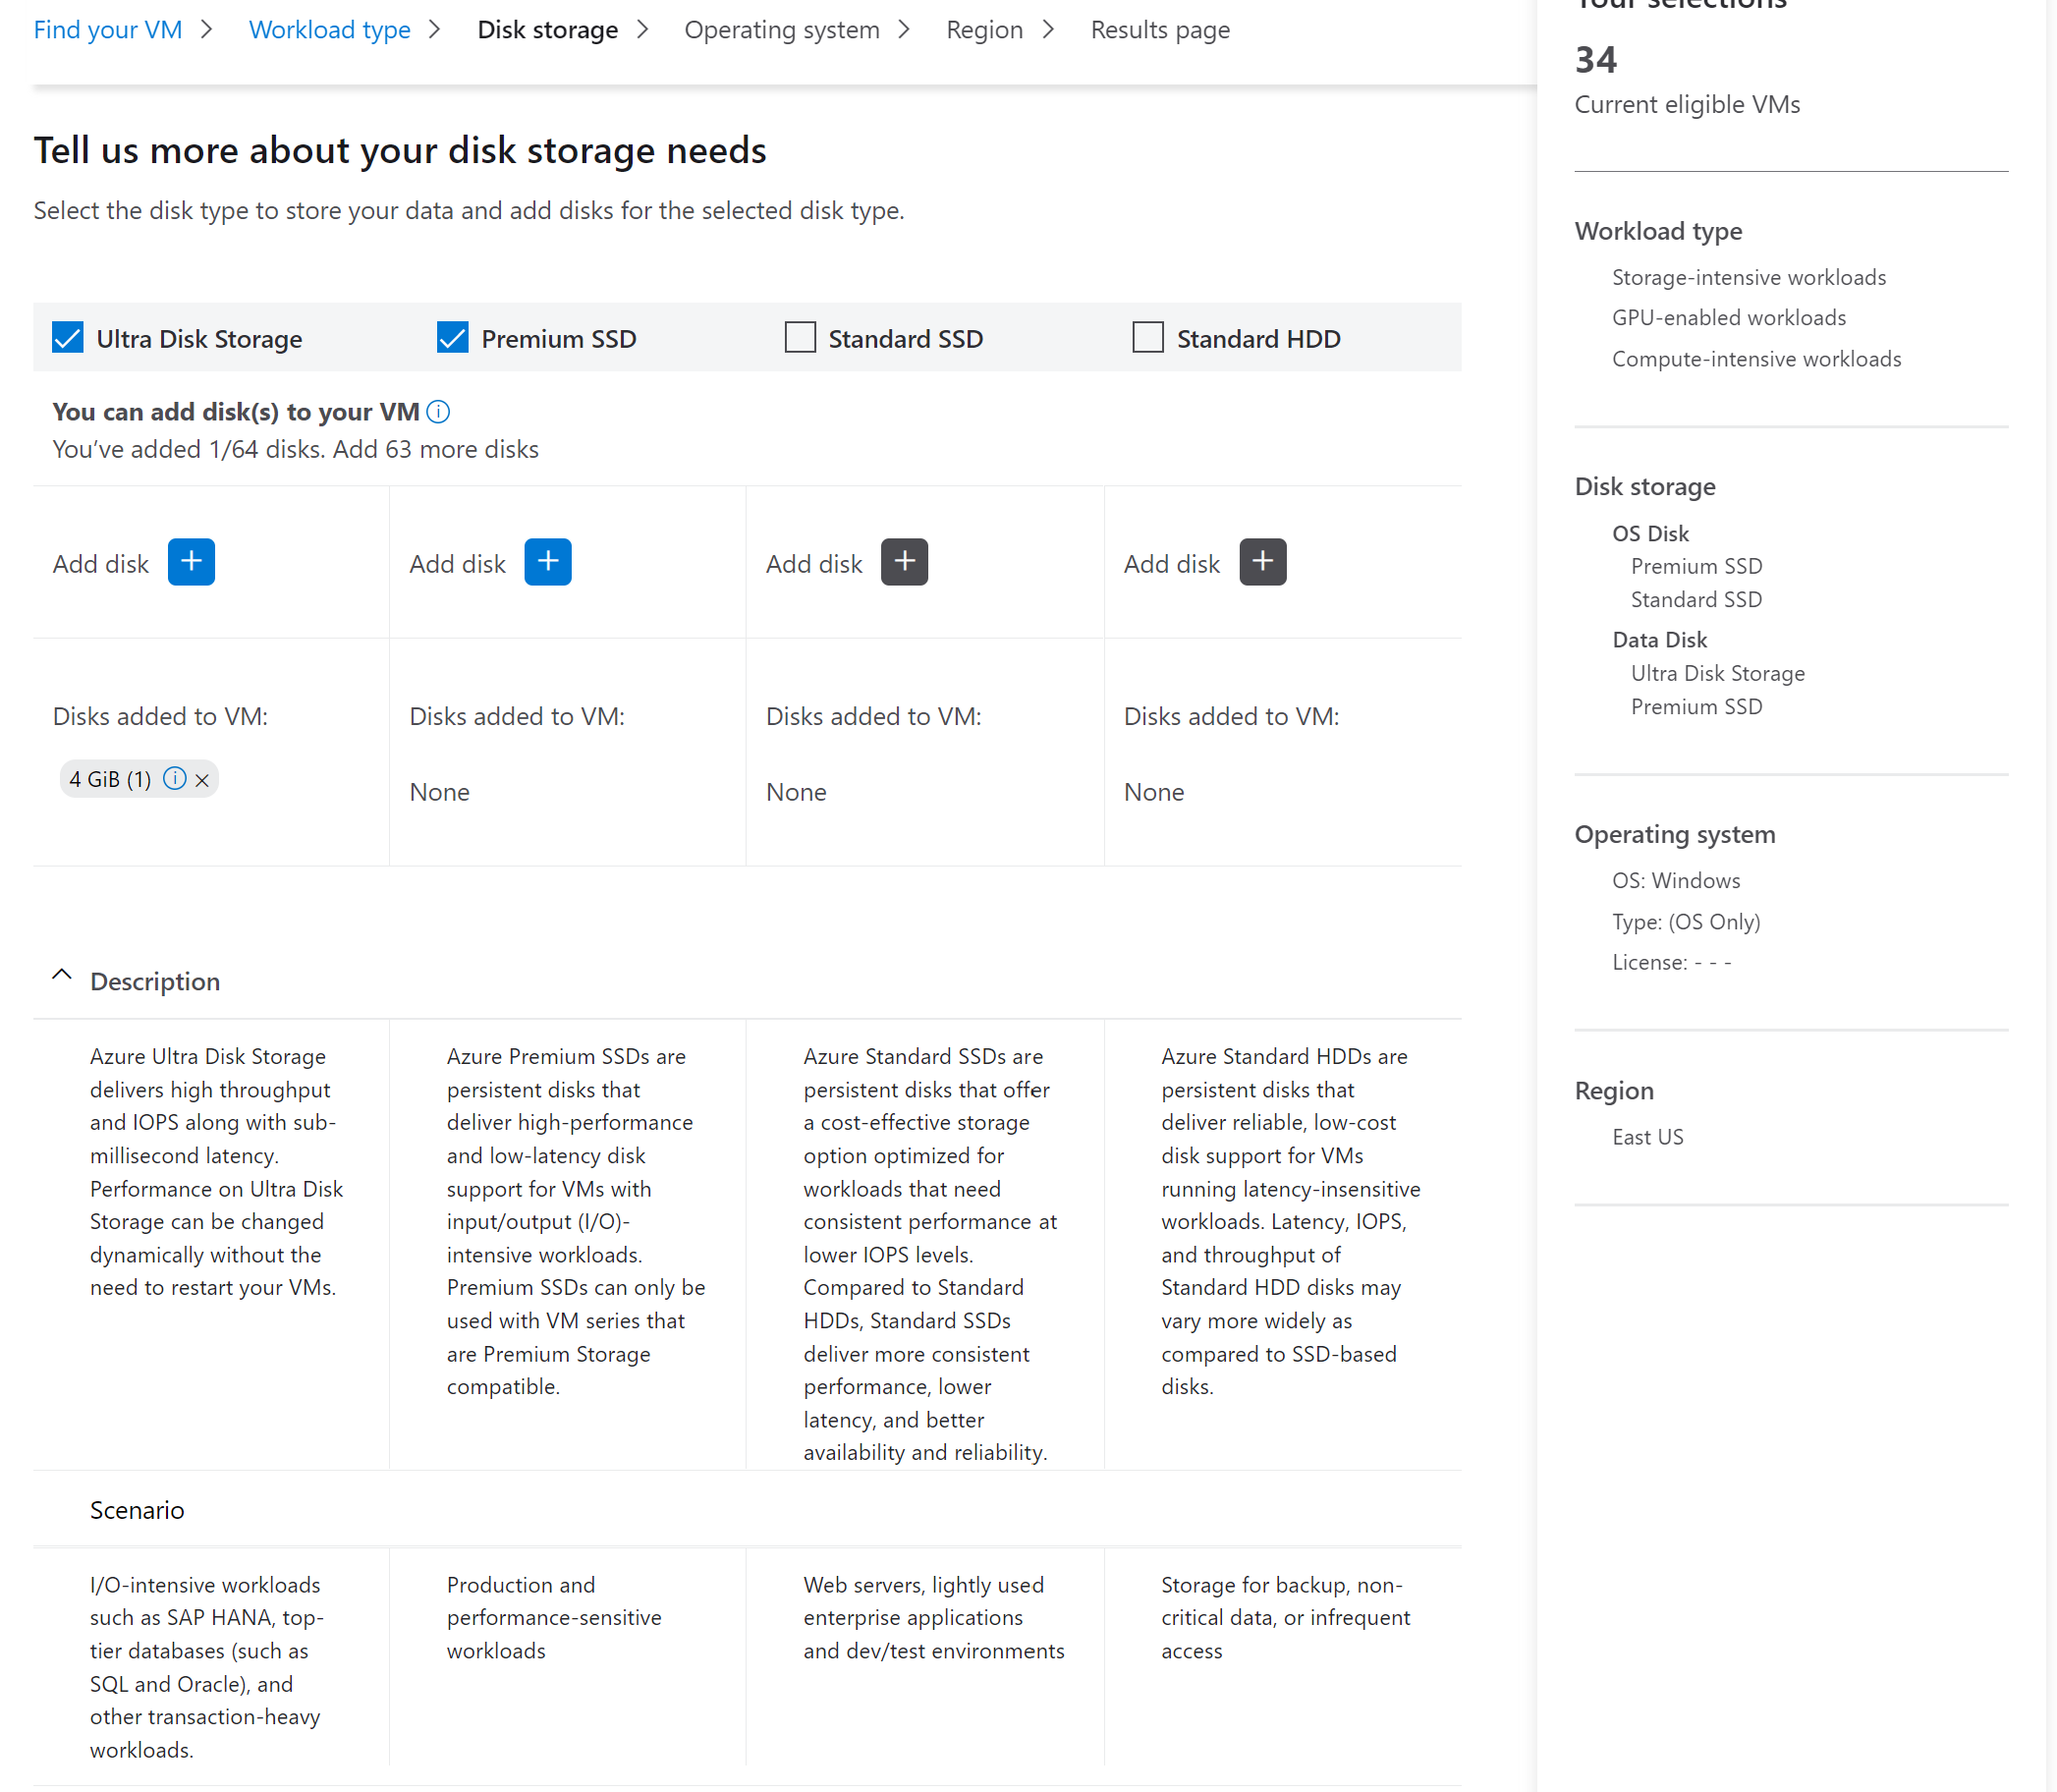
Once you have frozen on the feature set required , the next set of options are to select your storage requirements. Clicking on the Specs dropdown provides additional data points regarding the storage required.

If you want to add additional data disks the next set of options gives you the ability to attach disks to your VM’s. In the example below I have added a 4GB Ultra Disk to my VM’s.
Once you have chosen the storage , the next option is to chose the OS version required: Windows or Linux. If you have chosen Windows, you also have the option of selecting the Microsoft Software required ( SQL Server Std/Ent, Biztalk Std/Ent , etc.) .

Region Selection is the next option. Chose the region in which you plan to deploy these VM’s.

Once you select the region of deployment ( I have chosen South India) you get a comprehensive list of all the VM Instances that are available for you to deploy that matches your need.
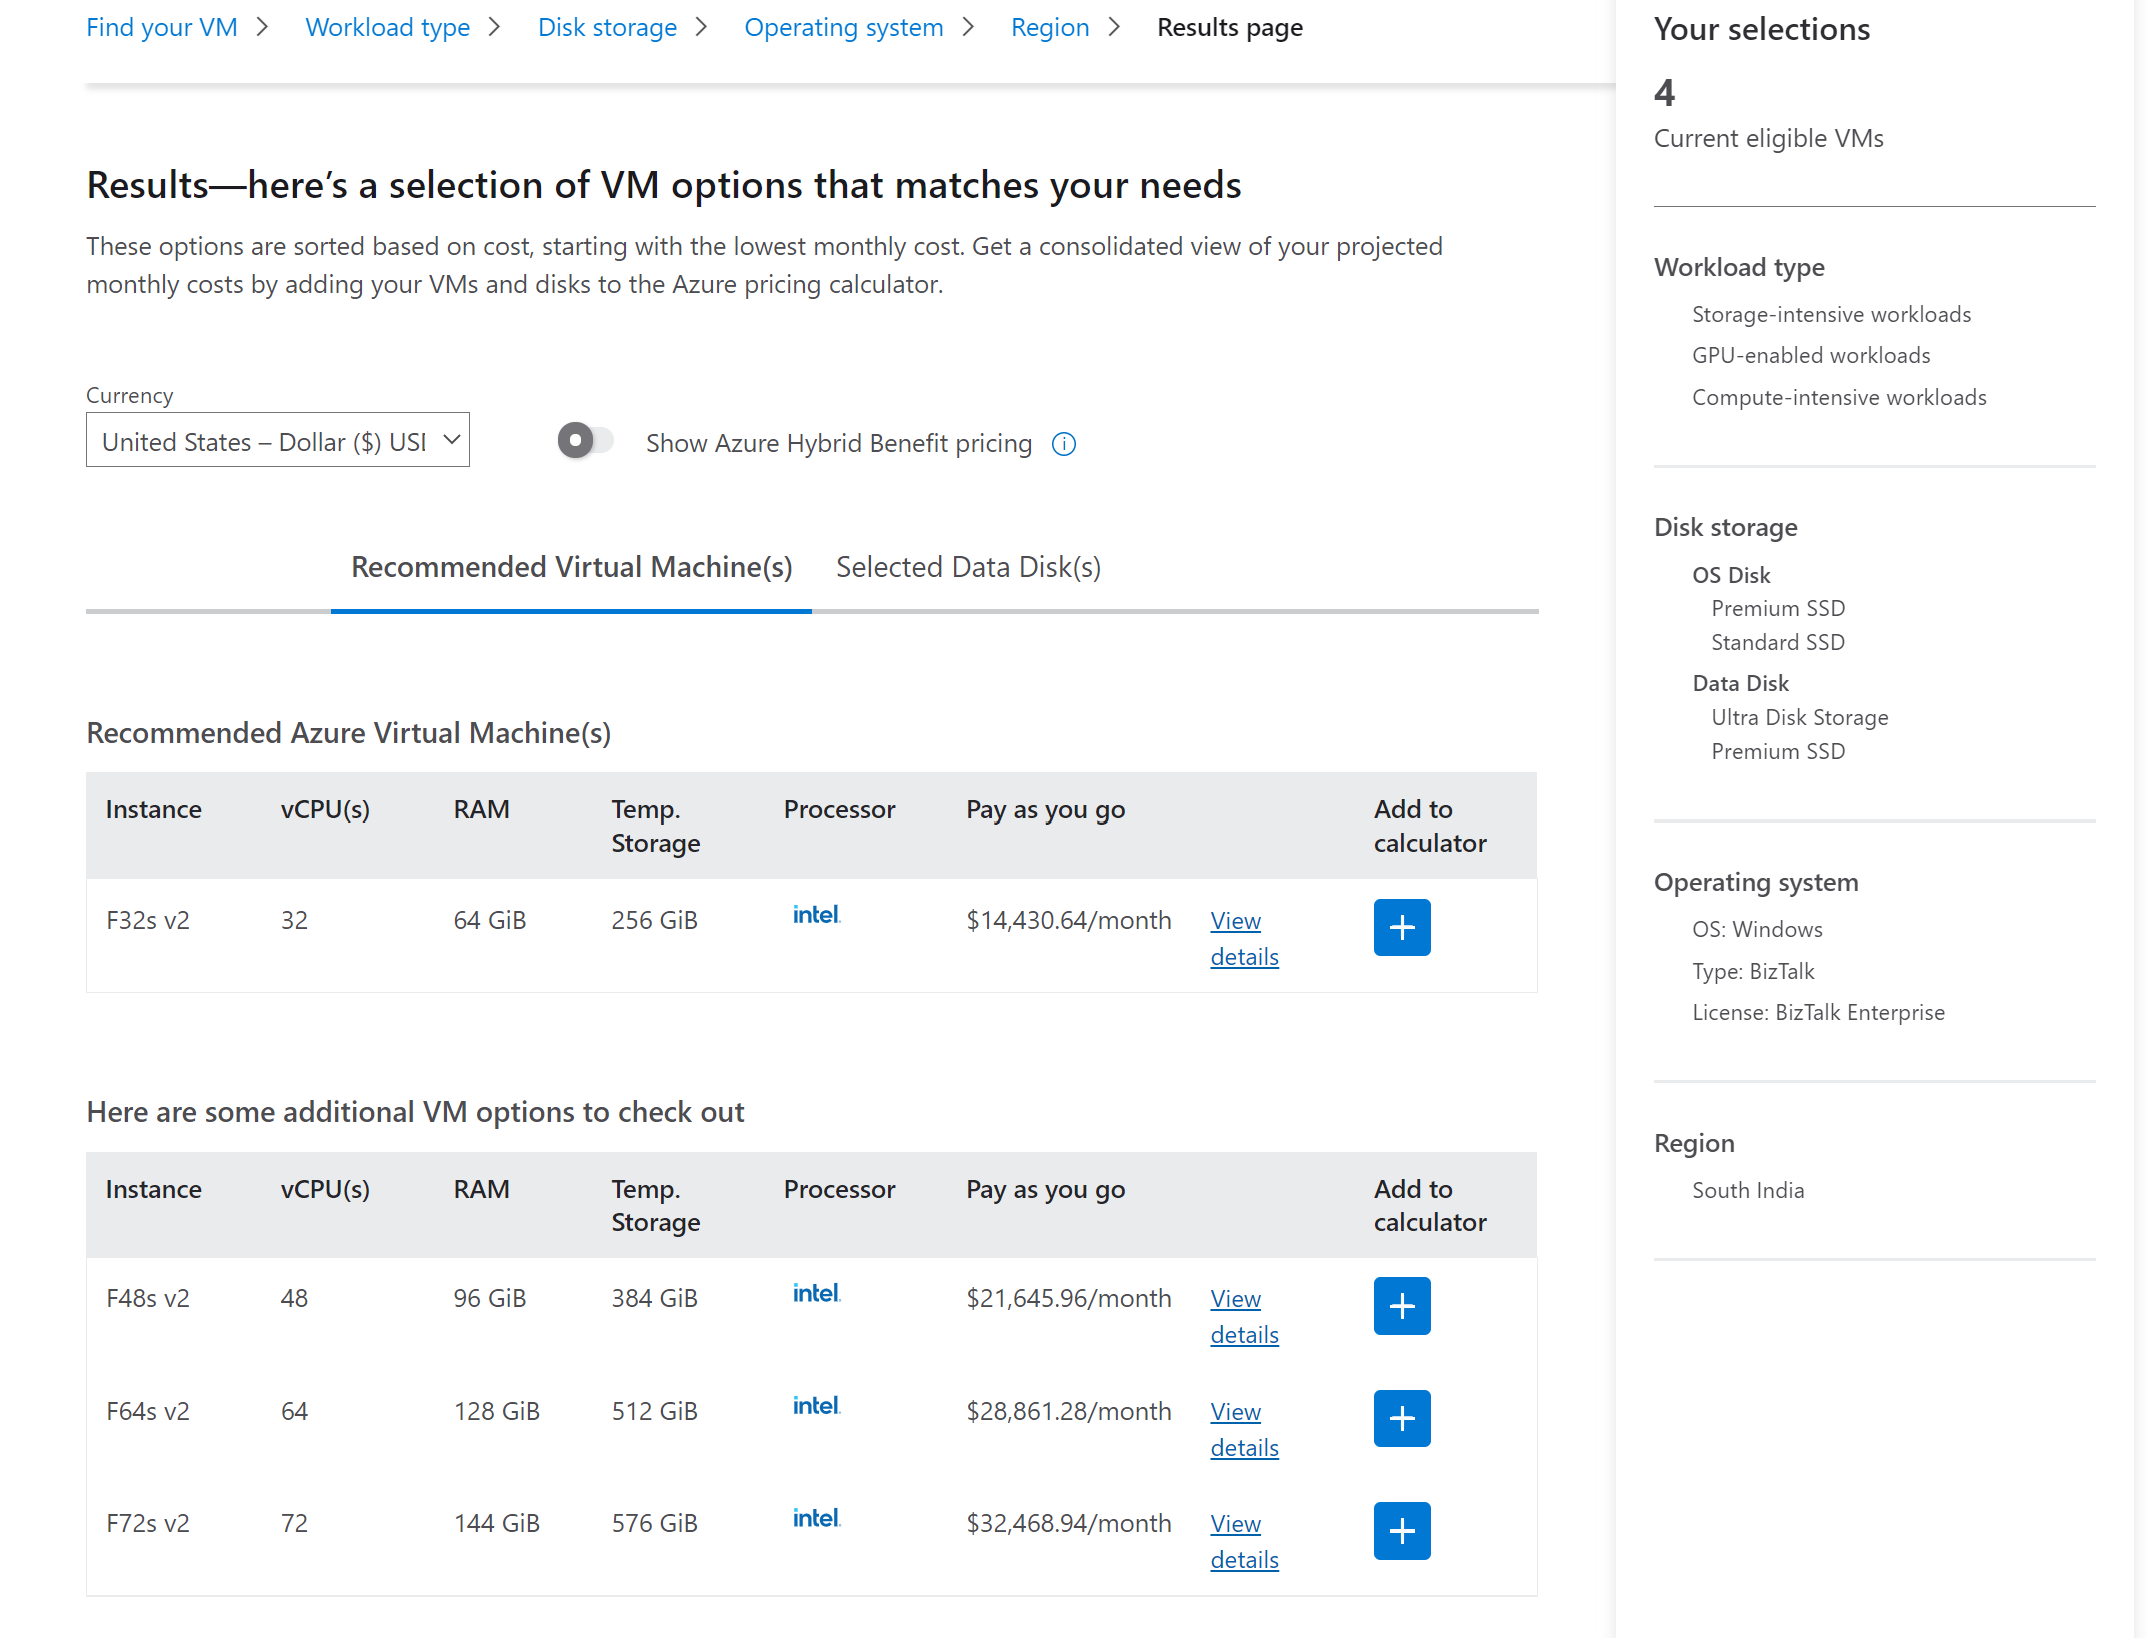
You also have the choice of adding these VM’s to your pricing calculator by clicking on the Add to Calculator plus sign. Once added you have the entire list of selected VM’s available inside your pricing calculator for easier analysis and exporting to Excel if required.

Give the Azure VM Selector tool and go and do provide feedback on how the tool is and if there are any specific features that would make this even more compelling for customers to use. Thanks for reading.